ViteネイティブなStory管理ライブラリのHistoireを使ってみたので使い方とかをメモ📝
Histoireの導入方法
私はVite + Vue3を既に使っていたので以下を参考に導入しました。
https://histoire.dev/guide/vue3/getting-started.html
導入はすごく簡単で、上記の公式ガイドの記載のとおりですが以下のコマンドでinstallして、
pnpm i -D histoire @histoire/plugin-vue
# OR
npm i -D histoire @histoire/plugin-vue
# OR
yarn add -D histoire @histoire/plugin-vue
histoire.config.tsをroot直下に配置1して、
import { defineConfig } from 'histoire'
import { HstVue } from '@histoire/plugin-vue'

export default defineConfig({
  plugins: [
    HstVue(),
  ],
})
scriptsにHistoireの起動コマンドを追記してあげれば大丈夫でした!
{
  "scripts": {
    "story:dev": "histoire dev",
    "story:build": "histoire build",
    "story:preview": "histoire preview"
  }
}
TypeScriptを利用する場合には追加で以下の型ファイルを配置し、tsconfig.jsonで読み込む必要があるようです。 ※storyの管理パスが既存のtsconfig.jsonの管理下に無ければ、それもincludeに追加します。
// env.d.ts
/// <reference types="@histoire/plugin-vue/components" />
  "include": [
    "stories/**/*.vue",
    "env.d.ts"
  ],
またGlobalに適用したいcssやpackage等があれば以下を参考に設定を行ってください。
https://histoire.dev/guide/config.html#global-js-and-css
// histoire.config.ts

export default defineConfig({
  setupFile: '/src/histoire.setup.ts'
})
この状態でyarn story:devを実行するとHistoireが起動するはずです⚡
yarn story:dev                                                                             7s direnv 20:29:22
yarn run v1.22.19
$ histoire dev
Using 4 threads for story collection
Collect stories start all
  ➜  Local:   http://127.0.0.1:6006/
  ➜  Network: use --host to expose
HistorieにStoryを追加する
以下のようにVue SFCでStoryを書くことができます。
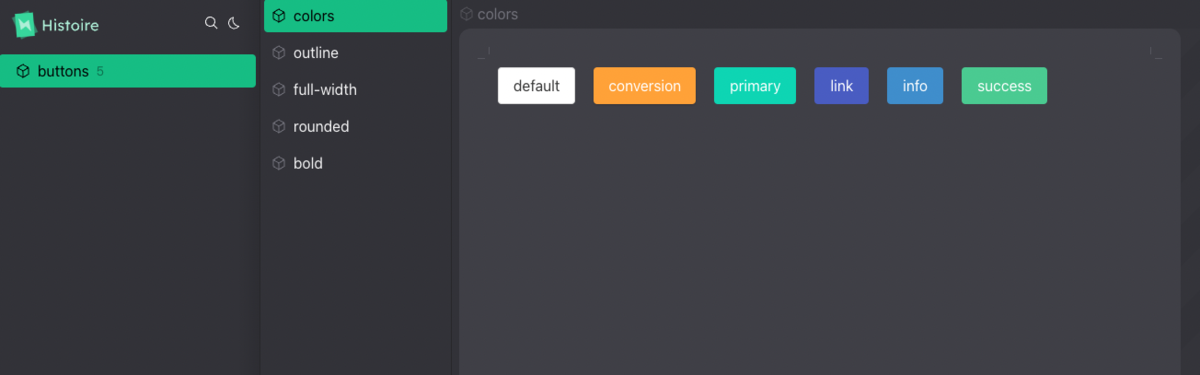
<template>
  <Story title="buttons">
    <Variant title="colors">
      <div class="buttons">
        <p class="buttons__item"><CommonButton> default </CommonButton></p>
        <p class="buttons__item"><CommonButton priority="conversion"> conversion </CommonButton></p>
        <p class="buttons__item"><CommonButton priority="primary"> primary </CommonButton></p>
        <p class="buttons__item"><CommonButton priority="link"> link </CommonButton></p>
        <p class="buttons__item"><CommonButton priority="info"> info </CommonButton></p>
        <p class="buttons__item"><CommonButton priority="success"> success </CommonButton></p>
      </div>
    </Variant>
    <Variant title="outline">
      <div class="buttons">
        <p class="buttons__item"><CommonButton :is-outline="true"> default </CommonButton></p>
        <p class="buttons__item"><CommonButton :is-outline="true" priority="conversion"> conversion </CommonButton></p>
        <p class="buttons__item"><CommonButton :is-outline="true" priority="primary"> primary </CommonButton></p>
        <p class="buttons__item"><CommonButton :is-outline="true" priority="link"> link </CommonButton></p>
        <p class="buttons__item"><CommonButton :is-outline="true" priority="info"> info </CommonButton></p>
        <p class="buttons__item"><CommonButton :is-outline="true" priority="success"> success </CommonButton></p>
      </div>
    </Variant>
    <Variant title="full-width">
      <CommonButton :is-full-width="true"> button </CommonButton>
    </Variant>
    <Variant title="rounded">
      <CommonButton :is-rounded="true"> button </CommonButton>
    </Variant>
    <Variant title="bold">
      <CommonButton :is-bold="true"> button </CommonButton>
    </Variant>
  </Story>
</template>
<script lang="ts" setup>
import CommonButton from "@js/components/atoms/CommonButton.vue";
</script>
<style lang="scss">
@use "bulma/bulma";

.buttons {
  display: flex;

  &__item {
    margin: 10px;
  }
}
</style>
上記の実装だと以下のような感じで表示されます。
詳しいStoryの書き方は以下を参照してください。
Histoireを静的に出力する
静的に出力するためにはscriptに追記した以下のコマンドを実行します。
yarn story:build
このときにViteの設定によってはHistorieの静的build時にエラーが発生しないようにhistoire.config.ts側でviteの構成を上書きするか、
import { defineConfig } from "histoire";
import { HstVue } from "@histoire/plugin-vue";

export default defineConfig({
  vite: {
    // override
  },
  plugins: [HstVue()],
});
https://histoire.dev/guide/config.html#vite-config-file
vite.config.ts側でprocess.env.HISTOIREの有無で分岐等を行う必要があるかもしれません。
const buildOption = (mode) => {
  if (!process.env.HISTOIRE) {
     // 通常buildのときだけ利用するbuild optionを記載
  }
};

export default defineConfig(({ command, mode }) => {
  return {
    build: { ...buildOption(mode), manifest: "manifest.json", copyPublicDir: false, assetsDir: "" },
ビルドした結果は以下のコマンドで確認できます。
yarn story:preview
おわりに
Viteを既に利用していると導入も簡単でStoryBookに比べてpackage.jsonで管理するpackageも少なくて良いですね✨